
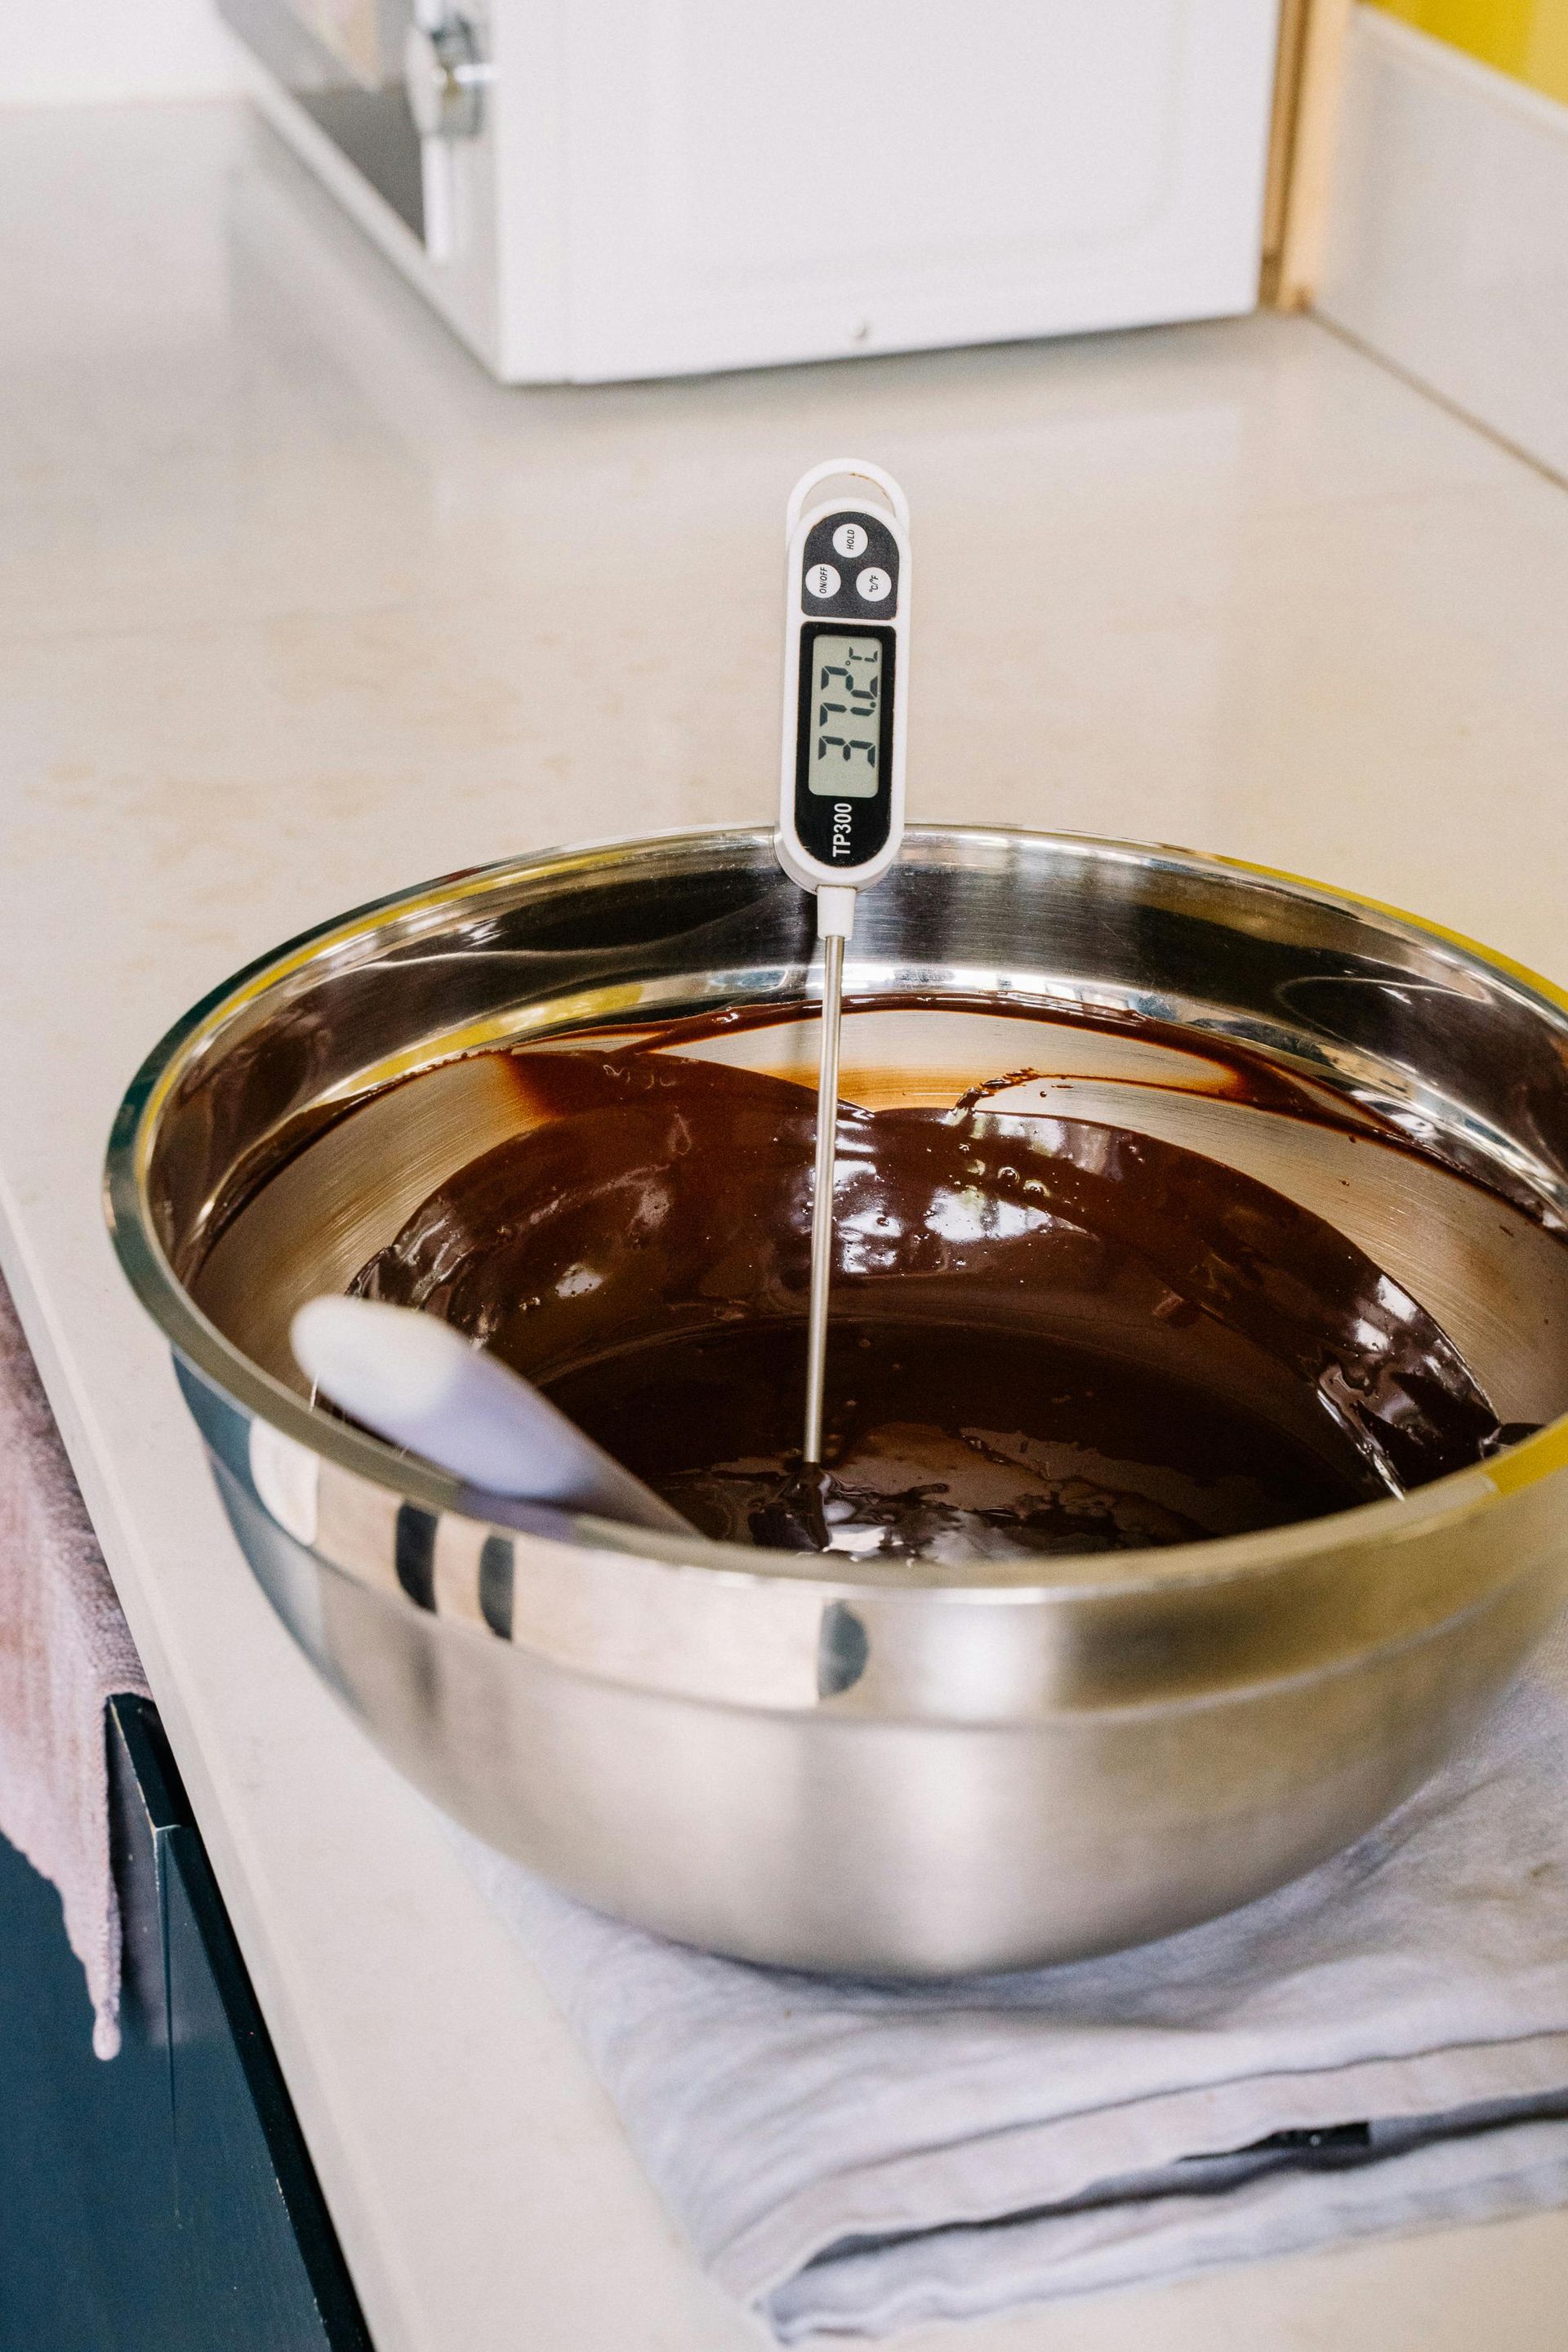
Have you ever wondered why some chocolate bars have a beautiful, glossy sheen and a satisfying snap, while others look dull and melt too easily? The secret lies in tempering , a process of carefully heating and cooling chocolate to achieve the perfect crystal structure. And the key to successful tempering? Temperature control. What Happens When Chocolate Isn't Tempered Properly? Untempered chocolate can suffer from a variety of problems: Bloom: A whitish, powdery coating on the surface caused by fat migration. Poor texture: The chocolate may be grainy, crumbly, or melt too quickly in your hands. Dull appearance: Instead of a glossy shine, the chocolate looks lacklustre. Difficulty setting: Untempered chocolate may take a long time to solidify or may not set at all. The Magic of Tempering Tempering ensures that the cocoa butter in chocolate crystallises in a stable form, giving it the desired qualities: Glossy shine: Properly tempered chocolate has a smooth, reflective surface. Crisp snap: It breaks cleanly with a satisfying sound. Smooth texture: The chocolate melts evenly in your mouth. Longer shelf life: Tempering helps prevent bloom and extends the chocolate's freshness. The Importance of Precise Temperatures Different types of chocolate (dark, milk, white) require specific temperature ranges for tempering. These temperatures are crucial for achieving the correct crystal formation. Too hot, and the chocolate can burn. Too cool, and it may not temper properly. Tips for Tempering Chocolate Use a reliable thermometer: A digital thermometer is essential for accurate temperature readings. Melt chocolate gently: Use a double boiler or microwave in short bursts to avoid overheating. Follow the temperature guidelines: Each type of chocolate has its ideal temperature range. Be patient: Tempering takes time and attention to detail. The Reward of Perfectly Tempered Chocolate Mastering the art of tempering unlocks a world of possibilities for chocolate creations. From elegant truffles to beautifully coated candies, the results are well worth the effort. So, the next time you're working with chocolate, remember the importance of temperature. With a little patience and precision, you can transform ordinary chocolate into extraordinary treats.
Creating beautiful and delicious chocolate treats is an art form, and mastering the techniques of moulding, unmoulding, and hand enrobing is key to taking your chocolate creations to the next level. Whether you're aiming for perfectly shaped chocolates, intricate designs, or a rustic, handcrafted look, this guide will break down the essentials of each technique. Moulding: Shaping Chocolate Dreams Moulding is the process of pouring melted chocolate into moulds to create specific shapes. It's ideal for producing consistent, visually appealing chocolates, from simple squares to elaborate designs. Choosing Your Moulds: Chocolate moulds come in a vast array of materials, including polycarbonate, silicone, and even metal. Polycarbonate moulds are known for their durability and ability to produce a high-gloss finish. Silicone moulds are flexible and make unmoulding easier, but may not provide the same shine. The Moulding Process: Prepare the Mould: Ensure your mould is clean and dry. For some moulds, especially polycarbonate, polishing the cavities with a soft cloth can help achieve a better shine. Temper Your Chocolate: Properly tempered chocolate is crucial for successful moulding. Tempering ensures the chocolate sets with a glossy finish and a good snap. Fill the Mould: Pour the tempered chocolate into the mould cavities. Tap the mould gently on the counter to remove any air bubbles. Setting: Allow the chocolate to set completely. This can be done at room temperature or in the refrigerator, depending on the type of chocolate and mould. Unmoulding: Releasing Your Creations Unmoulding is the delicate process of removing the set chocolates from the moulds without damaging them. Unmoulding Techniques: Tapping: For polycarbonate moulds, turn the mould upside down and tap it sharply on a firm surface. The chocolates should release. Flexing: Silicone moulds can be gently flexed to release the chocolates. Air Pressure: For intricate designs, a gentle burst of air from a compressed air canister can help dislodge the chocolates. Tips for Easy Unmoulding: Ensure the chocolate is fully set before attempting to unmould. If the chocolates are sticking, try chilling the mould slightly. Avoid using excessive force, as this can damage the chocolates or the mould. Hand Enrobing: The Art of the Dip Hand enrobing is a technique where you dip individual items, like cookies, fruits, or nuts, into melted chocolate to coat them. It offers a more rustic, handcrafted aesthetic compared to moulding. The Enrobing Process: Prepare Your Items: Prepare the items you want to enrobe. They should be at room temperature and dry. Melt and Temper Your Chocolate: Melt and temper your chocolate. Dipping: Dip the item into the melted chocolate, ensuring it is fully coated. Use a fork or dipping tools to maneuver the item. Excess Chocolate Removal: Gently tap the item to remove excess chocolate. You can also use a fork or scraper to create decorative swirls or patterns. Setting: Place the enrobed items on parchment paper or a wire rack to set. Tips for Hand Enrobing: Maintain the correct chocolate temperature for optimal coating. Use dipping tools to make the process easier and cleaner. Experiment with different decorations, such as sprinkles, nuts, or drizzles, before the chocolate sets. Combining Techniques These techniques can be combined for even more impressive results. For example, you could mould a chocolate shell and then hand enrobe a filling inside. Practice Makes Perfect Like any skill, mastering chocolate moulding, unmoulding, and hand enrobing takes practice. Don't be discouraged if your first attempts aren't perfect. With time and patience, you'll be creating beautiful and delicious chocolate masterpieces in no time!
When it comes to crafting delicious homemade chocolate, the ingredients you choose can make all the difference. While cocoa butter is the traditional fat used, there's a rising star in the chocolate-making world: coconut oil. Why? Let's dive into the reasons why coconut oil might just be the key to your best chocolate creations yet. The Benefits of Coconut Oil in Chocolate Coconut oil offers a unique set of properties that can elevate your homemade chocolate: Smooth, Creamy Texture: Coconut oil contributes to a wonderfully smooth and creamy texture in chocolate. It melts easily and evenly, creating a luxurious mouthfeel that's hard to resist. This is especially noticeable in vegan or dairy-free chocolate where it replaces the texture traditionally provided by dairy fats. Simpler Tempering (Sometimes!): While not always the case, some find that using coconut oil can make tempering chocolate slightly easier. Because of its specific melting point, it can sometimes be a little more forgiving than pure cocoa butter, though tempering is still generally recommended for the best results. However, it's important to note that not all coconut oil based chocolates require tempering. This depends on the recipe. Healthier Option (Potentially): Compared to some other fats, coconut oil is often touted as a healthier choice. It's rich in medium-chain triglycerides (MCTs), which some studies suggest may have potential health benefits. Of course, chocolate should still be enjoyed in moderation, but this can be a nice bonus. Vegan-Friendly: For those following a vegan lifestyle, coconut oil is an excellent alternative to dairy-based fats often used in traditional chocolate recipes. It allows you to create rich, decadent chocolate treats without any animal products. Unique Flavour Profile (Subtle): While not overpowering, coconut oil can impart a subtle, almost tropical note to your chocolate. This can add an interesting dimension to the flavour, especially when paired with other ingredients like nuts or fruit. However, refined coconut oil has a more neutral flavor. How to Use Coconut Oil in Chocolate Using coconut oil in chocolate is relatively straightforward. Most recipes will call for it to be melted along with your cocoa solids (cacao powder or chocolate liquor). Here are a few tips: Choose the Right Coconut Oil: For chocolate making, refined coconut oil is often preferred as it has a more neutral flavour. Unrefined or virgin coconut oil will impart a more pronounced coconut taste. Consider your desired flavour profile when choosing. Melt Gently: Melt the coconut oil and cocoa solids slowly and gently over a double boiler or in short bursts in the microwave to prevent burning. Experiment: Don't be afraid to experiment with different ratios of coconut oil to cocoa solids to find your perfect texture and flavour. The Verdict While traditional chocolate making relies on cocoa butter, coconut oil offers a compelling alternative with several potential benefits. From its smooth texture and potential health advantages to its vegan-friendly nature and subtle flavour nuances, coconut oil can be a fantastic ingredient for creating delicious homemade chocolate. So, why not give it a try and see if it becomes your new favourite chocolate-making secret?
